Your cart is currently empty!

Tech Specs
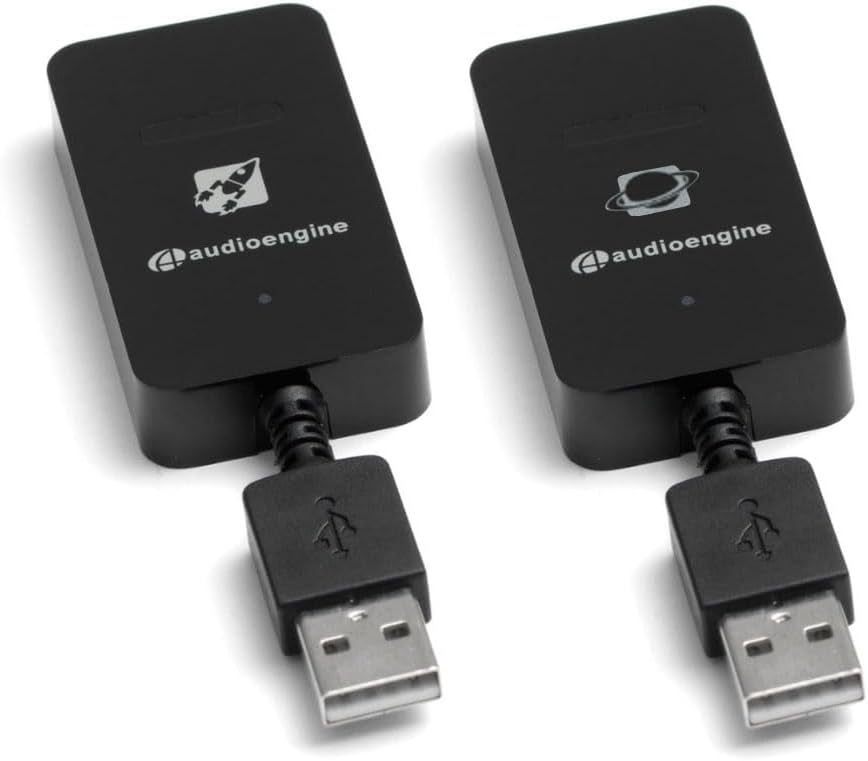
W3 Wireless Audio Adapter
Finally, you can stream all your music wirelessly from any audio source, app, or device to your powered speakers, stereo receiver, or powered subwoofer. Buh-bye, speaker cables. Hello, wireless audio with CD-like quality stereo sound.
Technical Specifications

General specifications
DAC type
Dual mode USB and analog (via CS5343 ADC) wireless DAC
Inputs
USB audio, mini-jack analog
Outputs
analog mini-jack
DAC
CS4344
ADC
CS5343
Full scale output
1.0Vrms
Output impedance
470 ohms
Power source
Sender: USB from computer or adapter
Receiver: USB power adapter
Power requirements
Sender: 180mA, 5V
Receiver: 150mA, 5V
SNR
95dB
THD+N
0.01%
Crosstalk
-65dB
Frequency response
20Hz to 20KHz, +/- .2dB
Input bit depth
up to 16 bits native
Input sample rate
up to 48KHz native
USB device class
type 1.1 or above
Wireless operation range
Up to 100ft (30m) typical
Latency
<20ms
Receivers supported
up to 3
Product dimensions
100x30x10mm (LxWxH)
Shipping weight
1 lb
Included accessories
minijack cable (20″), minijack to RCA adapter (12″), USB power adapter
Environmental
Operating Temperature: 32 to 95 degrees F
Non-operating Temp: -4 to 113 degrees F
Relative Humidity: 5% to 95% non-condensing
Advantages of wireless
The W3 wireless system transmits bit-perfect PCM-stereo simultaneously to up to 3 receivers. Because the USB controller in the Sender and the DAC in the Receiver are segregated by the wireless subsystem, various anomalies which plague many wired DACs such as jitter, grounding, and induced cable noise are greatly reduced. In addition, the W3 allows the user to physically isolate a potentially noisy computer from the sensitive audio components in your system.
W3 USB
The W3 utilizes the TI CC8520 PurePath™ USB wireless system-on-a-chip solutions, TI’s newest offering to the wireless audio arena. The Sender can be powered directly from the USB bus or from the included external power adapter.
W3 DAC
The W3 Receiver utilizes the CS4344 DAC, a solid, well regarded industry mainstay. Due to the CS4344’s’s high signal-to-noise specs, the W3 presents impressive low noise and low distortion characteristics.
Quickstart Guide
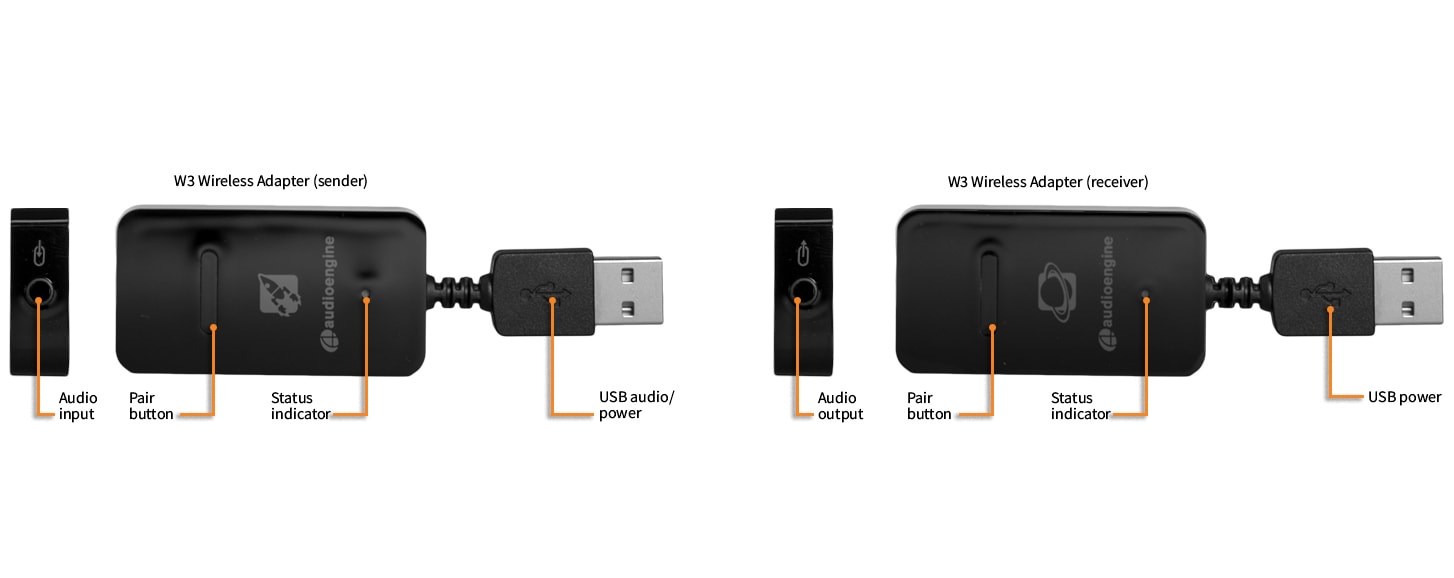
W3 Quick SetupSetup is really simple. The W3 Sender needs power and an audio input (either USB audio or audio into the mini-jack input on the end of the Sender). The W3 Receiver also needs power and a place to send the audio to, such as Audioengine 5+ powered speakers or any audio system.
There are many ways to use the W3 Premium Wireless Audio Adapter. Some possible configurations are listed here and a few specific examples are shown in the Configuration section. These are by no means all the possible uses – they are just shown to give ideas for your own setup.
Shown here are examples of some common W3 wireless configurations and setup instructions for each:
Note: If using Audioengine 5+ (A5+) powered speakers the A5+ USB power port can be used to power the W3 Receiver.
- Connect the W3 Sender to your computer’s USB port.
- For PC wait for the USB audio connection to be detected. For Mac OS, open System Preferences/Sound, select Output, then select “Audioengine W3”.
- Connect the W3 Receiver to the included power adapter and plug the adapter into a power outlet.
- Connect a mini-jack or RCA audio cable from the W3 Receiver to your powered speaker’s audio input.
- The status indicators on the Sender and Receiver will blink briefly and then go solid, indicating that they are paired.
- Play your music!
Note: If using W3 for USB computer audio there is no need to connect an audio cable from the W3 Sender to your computer’s headphone output. Doing so may create a ground loop resulting in unwanted noise.
- Follow steps 1 thru 3 above.
- Connect the included RCA “Y” adapter interface cable to the W3 Receiver audio output.
- Connect an RCA cable (not included) from your stereo receiver’s RCA inputs to the RCA “Y” adapter.
- The status indicators on the Sender and Receiver will blink briefly and then go solid, indicating that they are paired.
- Play your music!
Note: If you have Audioengine 5+ powered speakers, you may use the built-in USB power/charge port on the A5+ to power the W3 Receiver. Otherwise, you can use an iPhone charger or purchase an extra Audioengine power adapter.
- Connect the included mini-jack cable from your iDevice to the W3 Sender audio input.
- Connect the W3 Sender to the included power adapter and plug the adapter into a power outlet.
- Connect the included mini-jack cable from the W3
- Connect the W3 Receiver to another power adapter (1 power adapter is included, others sold separately).
- Plug the power adapter into an AC outlet.
- The status indicators on the Sender and Receiver will blink briefly and then go solid, indicating that they are paired.
- Play your music!
- Connect the W3 Sender and W3 Receiver to power adapters and plug each into a power outlet.
- Connect your surround sound AV receiver’s rear channel (or subwoofer) RCA outputs to the W3 Sender input.
- Connect the W3 Receiver to your powered rear channel speakers (or subwoofer).
- The status indicators on the Sender and Receiver will blink briefly and then go solid, indicating that they are paired.
- Play your music!
Note: To set up wireless rear channel speakers AND a wireless subwoofer from your surround system, simply add another W3 Sender/Receiver pair and repeat the previous instructions.
For the full setup guide, download the attached PDF:
W3 setup guide
W3 Setup Video
Troubleshooting
W3 Troubleshooting TipsThe following troubleshooting tips can help diagnose and correct most concerns with the W3. We have attempted to make this list as comprehensive as possible, so some of these may not apply to your issue, but please go through each tip.
- Check to make sure that the W3 Receiver’s power supply is properly connected to AC power.
- If using the W3 to get music from your computer DO NOT connect the included mini-jack cable from the W3 Sender to your computer’s headphone jack. Instead use USB audio from your computer as the W3 was designed. Check the W3 setup guide to see how this is done.
- Verify that your audio source is playing music and that all of your connections are inserted correctly. If one of the cables is not plugged in all the way, you may only hear audio through one channel so unplug the cables in your setup and reconnect to verify.
- Repeat the Sender/Receiver pairing process within 5 feet of each other.
- Unplug the W3 from your computer and restart. Test the W3 with your system again.
- Check to make sure your device (computer, phone, or tablet) is running the most up-to-date version of software available.
- Try your W3 in a different location to see if something is causing an issue in the current setup. Something as simple as a wireless internet router, cordless or mobile phone, or halogen lamp near the speakers may be causing interference in your setup.
- Try these tips if your computer is not recognizing the speaker through the USB input or the sound through USB isn’t functioning correctly:
- If using Windows, uninstall the USB driver from your computer. Then remove the W3 Sender from your computer and plug it back in to allow the driver to reinstall automatically. You can find instructions from Microsoft on how to reinstall a plug-and-play device under Windows here.
- If you are using a Mac, try a NVRAM/PRAM reset. This resets the system configurations for some audio and video related things and can many times help clear up problems related to audio. See Apple’s support page for information on how to do this.
The W3 is designed to “play nicely” with other wireless products but issues like this do come up from time to time depending on the type of router(s) being used, other wireless systems in the area, your computer, building construction, etc.. If you are experiencing an issue with your wireless network or interference, here are some things that may help:
- Please try changing the channel of your Wi-Fi router to 1 or 11. This can be done with an Apple router using Apples Airport Utility software. On most other routers, these settings can be accessed by logging on to the routers IP address through a web browser.
- Please try to keep as much room between the W3s sender and receiver units, and other wireless devices as possible. At least 2 or 3 feet is recommended.
- Please try temporarily moving the powered W3 sender unit as close as possible to your wireless router. Leave it there for just a few minutes, and then place it back into your setup and retest. This may allow the W3 to train itself to “steer clear” of the signal.
- We have found that every now and then the placement of the computer’s antenna in relation to the USB port can have this effect on the W3. One thing you could try is to move the W3 further from the computer by using a USB extension cable. – If using a Mac laptop, try the USB port furthest away from the display (the display is where the wifi antenna is located).
- Consider upgrading to a new wireless router if yours is older than 3 or 4 years. Newer model routers handle interference much better than older routers.


